Adobe InDesign

Magazine feature page; double page spread tutorial

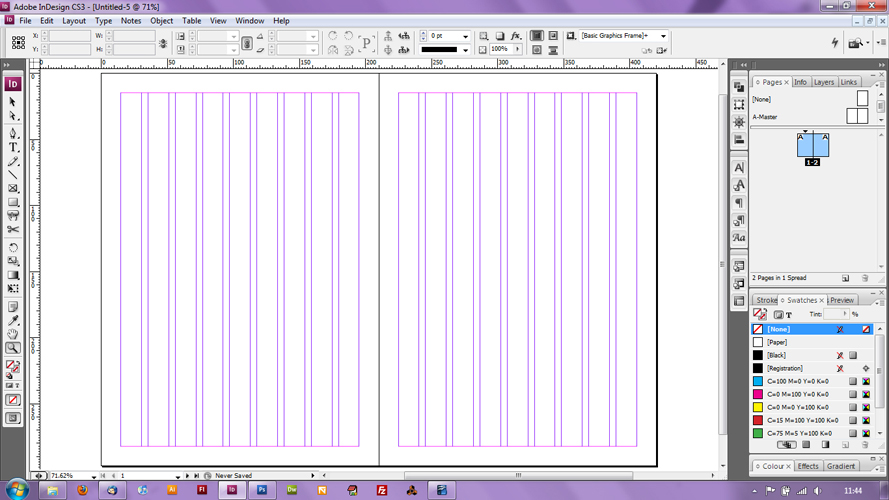
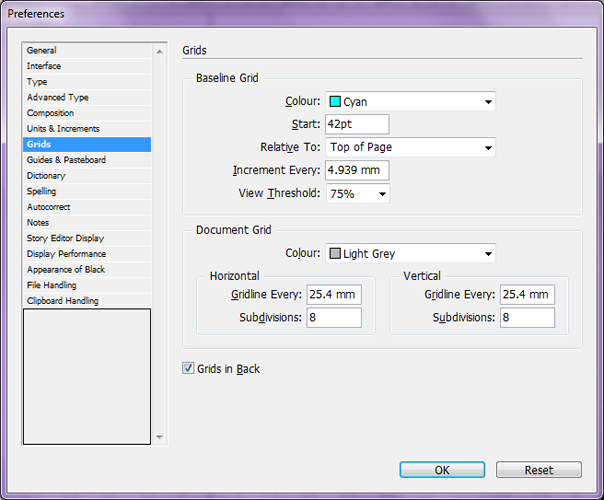
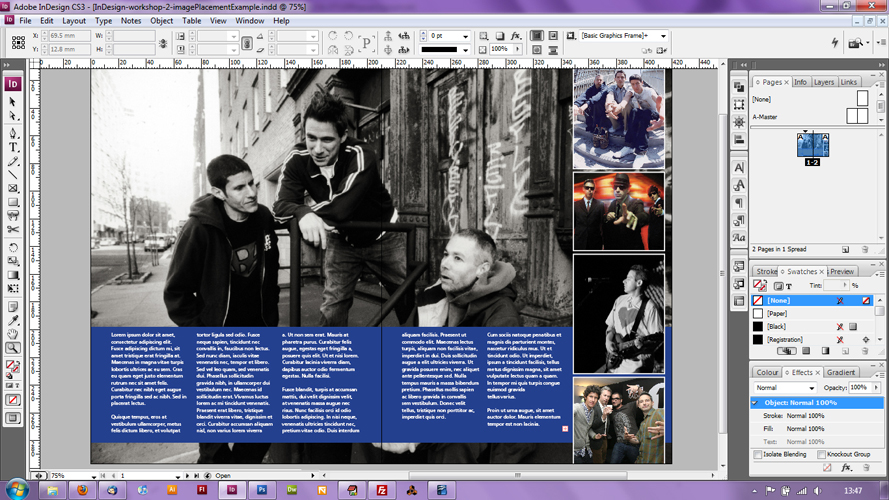
Step by step guide to creating a flexible layout grid using the toold in Adobe InDesign and the application of a specific layout to it.

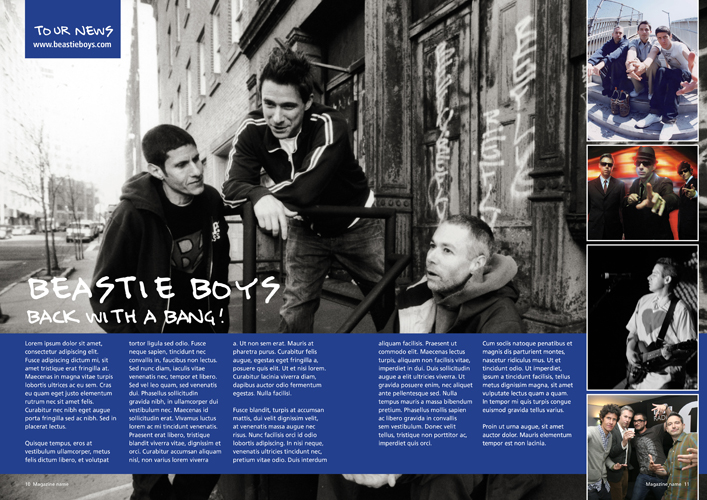
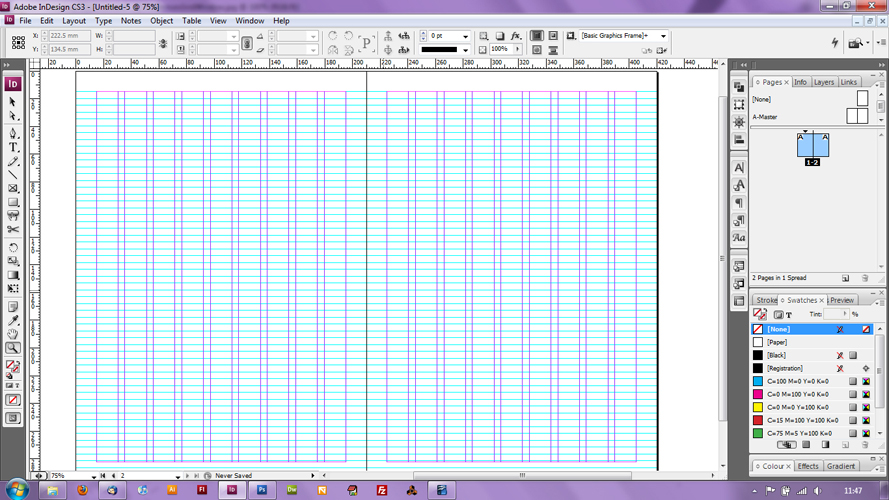
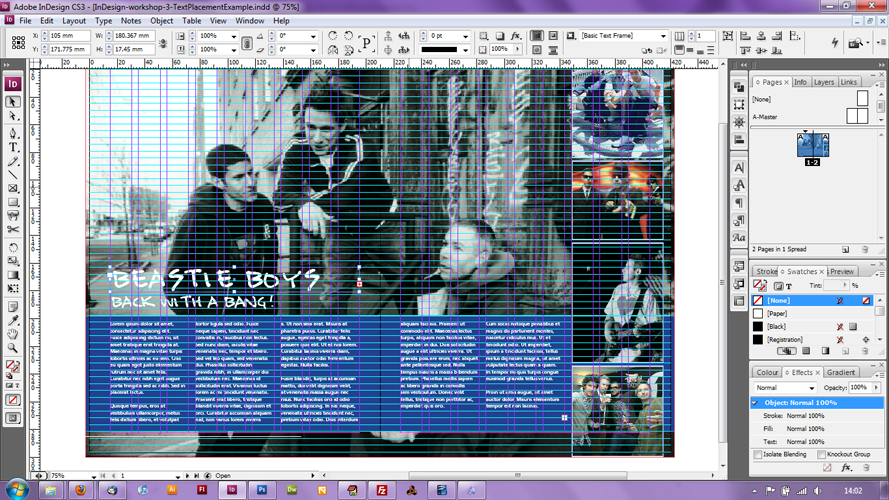
This tutorial walks through the creation of a ficticous double page spread for a non-existant music publication.

All photographs used in this design have sourced with a simple google image search. Most of them are not up to print standard and are only used here as examples. They are used in this tutorial in a non-profit context.

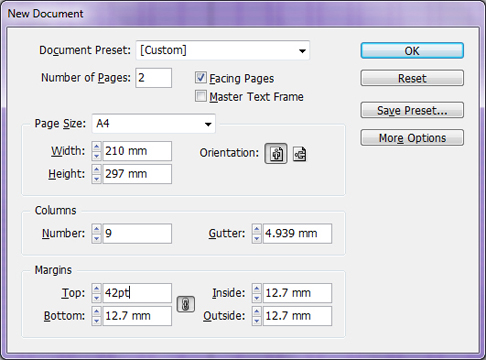
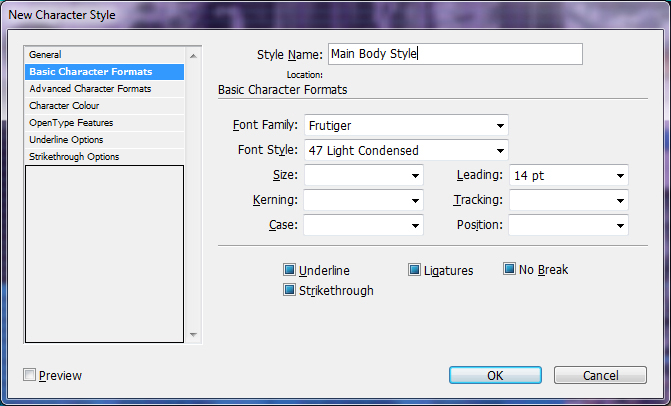
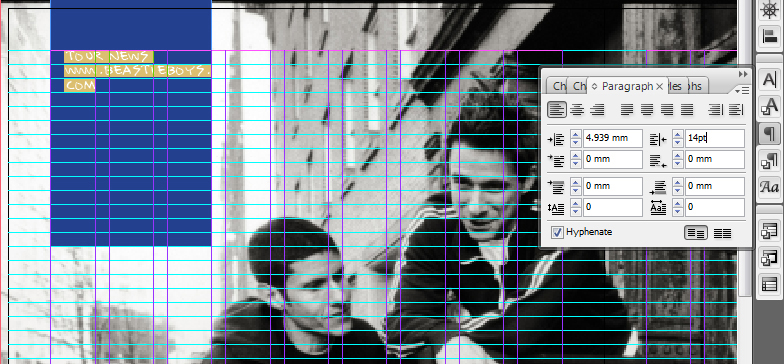
This tutorial will use a baseline figure of 14pt. All measurements will be multiples of this figure. Margins will be 42pt (3 x 14) for example. Keeping all measurements as multiples of the baseline figure will give the design an overall regularity and harmony.

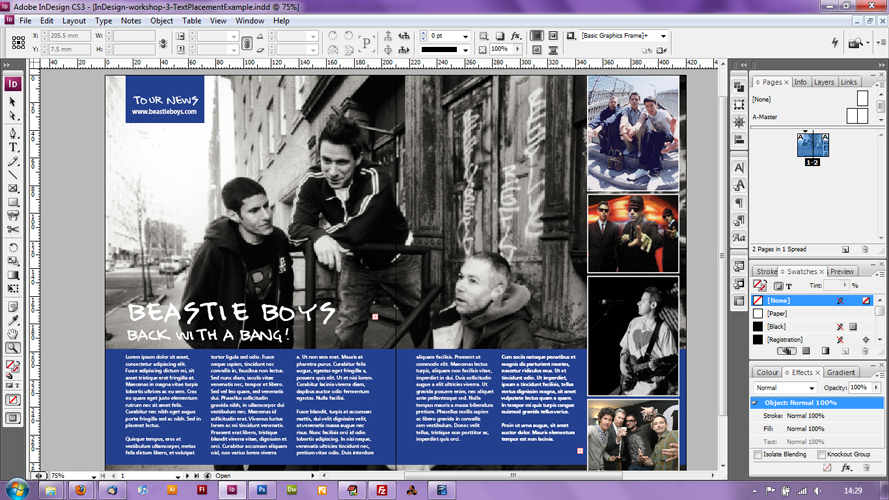
Here is the layout design this tutorial works towards:

Completed design

1

During the course of this tutorial various figures will be entered into many of InDesign's input fields. Largely these will be measured in points. Adobe InDesign's default scale is in millimeters. ANY valid scale can be entered into any of InDesign's inputs which will then automatically be converted to whatever is selected as the default scale.

Simple mathematical equations can also be entered into these fields and also in varying valid scales. InDesign will perform the conversion to the default scale and will evaluate the equation.

  1. Open Adobe Indesign
  2. Select Print Document
  3. Set the number of pages to 2
  4. Set the pagesize to A4 and orientation to portrait
  5. Set column number to 9 and then inside the Gutter input, type 14pt to set the gutter to 14 points (this should display as 4.939mm)
  6. In the margins area, making sure the link icon is selected as shown, type 42pt into one of the margin entry fields.
New Document window

2

  1. Locate the Pages panel usually to be found in the right hand panel bar (hereafter RHPB).
Pages panel

3

  1. Open the panel menu option and uncheck Allow document pages to shuffle.
  2. In the main body of the pages panel two pages should be displayed as shown in Step 2. Click and drag on one of these pages positioning it so that it's interior edge meets the interior edge of the other page, when the position is correct the black page seperator will change to a bracket shape. The 'bracket' will look something like this ].
Pages menu

4

  1. Releasing the mouse button at this point should result in the pages being displayed as a double page spread.
  2. The project should now be as displayed. Nine columns should be visible on each page with gutters and margins marked out with guidelines.
4 Column grid setup

5

  1. To setup a baseline grid, open the grids window by clicking edit and selecting preferences, then grids.
  2. Enter 42pt in the start field to set the baseline grid to begin at the top margin.
  3. Enter 14pt in the increment every field.
  4. If grids in back is checked, uncheck it.
Grid preferences

6

  1. To toggle the baseline grid on press CTRL + ALT + '.
  2. The project should now be as displayed.
  3. This nine column 14pt baseline grid is extremely flexible. The design this tutorial works towards is mainly a 3 column per page grid. Should three columns each spanning three display columns per page become unsatisfactory during the design process a nine column grid can easily adapt to other 3, 4 and 2 columns layouts configurations. If a three column per page guide grid had been used this would not have been possible and the grid would have had to be revisited and adjusted.
Baseline grid in place

7

  1. Toggle the baseline grid off for a moment by pressing CTRL + ALT + '.
  2. Move the mouse pointer over the ruler visible at the top of the InDesign workspace. Click and drag down into the page creating a new horizontal guide. Release the mouse button to confirm.
  3. With the new guideline still selected, locate the Y entry at the top of InDesign. In this entry box type 297mm / 3 (the height of the page divided by 3) and press return.
  4. The Y entry should now show 99.
  5. Create another new guide repeating the steps as above.
  6. With the second new guide still highlighted type 99 * 2 (99 multiplied by 2) and press return.
  7. The document should now have 2 horizontal guides dividing the page into three horizontal strips of the same height as shown.
  8. If guides are only shown on one page of the double page spread these steps can be repeated on the other page.
  9. This completes the layout grid. Saving the project at this point will allow this grid to be easily resused as a template for other projects.
Divide the page into 3rds.

8

  1. To add the content
  2. Add a bleed area to the document by opening the document setup panel, click file at the top of InDesign and select document setup. Making sure the link icon is selected enter 3mm into any of the bleed entry fields, this should be duplicated to the remainder.
  3. Locate the rectangle tool in the left hand tool panel (hereafter LHTP) and select it.
  4. Click and drag out a rectangle over the document. Adjust the rectange by selecting the selection tool from the LHTP and by moving the handles around the rectangle's edge. Have the left and right edges of the rectangle meet the bleed lines at the extreme right and left of the spread respectively. Have the top of the rectange meet the lower of the two guide lines added in Step 7 and the bottom edge of the rectangle should meet the bottom margin guideline.
  5. Add a colour to the rectangle make sure the fill swatch is uppermost at the bottom of the LHTP and select a colour from the swatches panel to be found in the RHPB.
Draw the text block.

9

  1. Select the rectangle frame tool from the LHTP and drag out a new rectangle.
  2. Manipulate each edge of this new rectangle with the selection tool so that each of it's edges meets it's respective bleed line.
Draw the background image container.

10

  1. To add the background, select place from the file menu at the top of InDesign and browse to the location of the desired image (it is a good idea to collect all images to be used together in one folder and to keep this in a similar location to the InDesign project).
  2. To fill the image frame locate object menu at the top of InDesign and select fitting and then fill frame proportionally.
  3. The image can be further adjusted without moving it's containing rectangle by using the direct selection tool from the LHTB. The image should be placed so that focal points in the image are located as closely as possible to the upper of the guidelines created in Step 7 and remembering to keep any important elements away from the center fold.
Adjust the background image.

11

  1. Toggle the baseline grid on by pressing CTRL + ALT + '.
  2. Create and manipulate a new image container with the rectangle frame tool and the selection tool so that it is placed in the upper right corner of the document. The upper edge of this rectangle should meet the top bleed line, the rectangle should span three columns and be slightly taller than it is wide. The lower edge of the rectangle should meet the nearest baseline guide.
  3. Adjust the width of the rectangle by finding the width input at the top of InDesign with the rectangle selected, it will say something like 55.419 mm. Click into this input and append + 28pt so the entry reads 55.419 mm + 28pt. This will widen the rectangle. Locate the X input near the width input and append + 14pt to the current content so that it reads 375.357 mm + 14pt. This will reposition the rectangle correctly.
Adding the images column.

12

  1. Using place (file > place), fitting (object > fitting and the direct selection tool as before and in that order add the first feature inset image into the layout.
  2. To add the outline, clear any fill present in the fill swatch at the bottom of the LHTB, make sure the outline swatch is uppermost and select the white swatch from the swatches panel in the RHPB.
  3. Locate the stroke panel in the RHPB. In the weight entry box enter 3. Align the stroke to the inside of the image container by clicking the middle icon on the align stroke row in this same panel.
Add and border the new image.

13

  1. Repeat most of the actions in Stage 11 and Stage 12, or cut and paste the existing image several times as required so a column of images is created down the right hand side of the layout as pictured.
  2. Add the required inset images into the rectangles, or replace the copied image by using place as before or with the links panel found in the RHPB.
  3. Line up the image containers vertically by dragging the container to the guideline to the left of the first image container. With the help of the align panel, found in the RHPB (or in the window menu at the top of InDesign), make sure these inset image containers are all evenly spaced by selecting them all simultaneously and clicking the distribute vertical space control button. To simultaneously select these images use the selection tool, click one image container and then holding the shift key click on each of the other image containers in turn, this should allow all to be selected at once.
  4. Try to have each image container's lower edge meet one of the baseline grid guides. This will give the column a sense of harmony as each image will end in a regular place relative to other elements in the design.
Feature inset images complete.

14

  1. Select the type tool from the LHTB. Click and drag to create a text rectangle. Arrange this rectangle to span three of the guide columns as shown. Have the top of the text rectangle meet a baseline guide leaving one baseline guide width between the top of the text rectangle and the top of the horizontal coloured rectangle as shown. Do the same with the bottom edges.
  2. Duplicate this text rectangle four times making a total of five rectangles. Place these rectangles aligned horizontally along the coloured rectangle each spaced to span three guide columns.
Draw text block.

15

  1. Copy the content text you will be using (CTRL + C> in most applications). For the purposes of this demonstration design some Ipsum has been used, this was sourced from www.lipsum.com.
  2. In InDesign select the type tool and click the text rectangle on the left.
  3. CTRL + V will paste the content text into the leftmost rectangle.
  4. If the content text overflows the containing text rectangle a small white box containing a + symbol will appear towards the lower right corner of the text rectangle. Clicking this symbol will append a preview of the text block to the mouse pointer. Click into the next left text rectangle and the overflowed content text should appear in this next text area.
  5. Repeat the last stage until all five text rectangles are filled with text. The should resemble the illustration shown.
Added text.

16

  1. To format the body text locate the character styles panel in the RHPB and open it's panel option menu. Select new character style.
  2. Name the character style as required. Select the desired font family and font style in each respective field, set the size field to 12pt and the leading field to 14pt. The values used in the demonstration design are shown here.
  3. Set the colour of the body text by selecting character colour from the left hand menu bar in the character styles window and then selecting the desired swatch.
Character class properties.

17

  1. The newly created character style should appear as a new entry in the in the list area of the character styles panel.
  2. Select the type tool from the LHTB and click into any of the text areas. Use CTRL + A to select all of the body text. Click the new character style listed in the character styles panel. The body text should now display as desired.
Styled body text.

18

  1. Create two more text blocks, one for a main heading and one for a subheading. Arrange them as shown making sure that their left edges are aligned with the left edge of the left most body text area and that their top edges meet a line of the baseline grid.
  2. Style the heading text as desired by either manipulating the values in the character panel or creating a new character style in the character styles panel and applying it as before.
  3. Make sure font sizes are regular values (one of the preset values) and that the leading applied to each is either 14pt or a multiple of 14pt.
Add in the main titles.

19

  1. Add new text rectangles to the lower outside corner of each page and type page numbers into each.
  2. Style the page numbers as before.
  3. Align the left edge of the left hand page number rectangle with the left margin. Align the right edge of the right hand page number rectangle with the right hand edge of the inset picture column, with this rectangle selected locate the X entry at the top of InDesign. Keeping the present value of the X entry field, append - 14pt. This should move the right hand page number rectangle to the left by exactly 14pt.
  4. Alternatively, if desired, the right page number rectangle can simply be positioned against the right page right hand margin.
  5. Both page number text rectangles should be positioned so that their upper edge meets a baseline grid line.
Add in the page numbers.

20

  1. If desired the page can be finished with a corner block with some meta information. This can be created using techniques already covered.
  2. Have the corner block the same fill colour as the rectangle behind the text blocks.
  3. Make the rectangle three guide columns wide and aligned at the top to the upper bleed line and at the foot to a baseline grid guide.
  4. Add a 14pt margin to the interior textblock by sizing it exactly over the coloured rectangle and then entering 14pt into each of the padding entry fields of the paragraph panel, often found in the RHPB and usually grouped alongside the character panel.
Add in the page corner info.

21

  1. This completes the design and the tutorial.
The completed design, in InDesign.